Another recent comment came from seasoned users who have been working in AutoCAD for many years. “Why has Autodesk taken away the menu bars in place of the ribbon” (or indeed questioning other interface issues they have). For me the two users are similar in many respects. The new user is cautious of the unknown and the seasoned user is safe in his known workflows and resistant to change. Both users need to fully understand the way AutoCAD can best assist their drafting needs.
I want to go through a simple guide that helps move from a known point of understanding to unknown places, the unknown now becomes the known.
Starting up AutoCAD gives us the interface. This alone can be very daunting, both for the new user and also to the seasoned user who remembers the old menu bars being placed around the screen.
The interface is very intuitive of draughting workflows. Looking at the way it is laid out it is the same as when we read a book, we automatically read from the top left through to bottom right. In AutoCAD the top left is where we see the application icon. This is the primary interface in accessing the AutoCAD application. For draughting the left-most tab on the top ribbon is the home tab. We start at home and embark on our work.
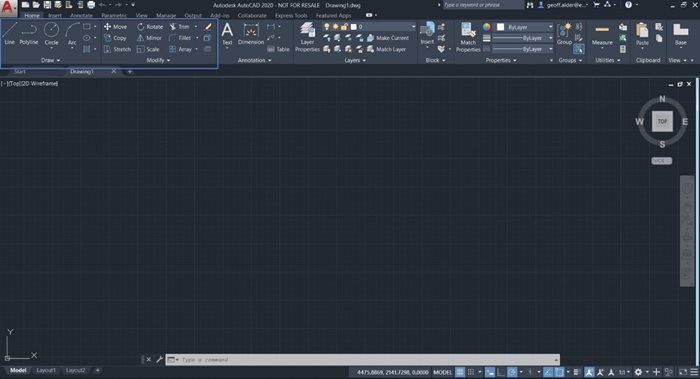
Here we have the interface and the first two menus which are Draw and Modify. Mastering AutoCAD starts right here. By practicing these commands, you have the essential grounding of AutoCAD knowledge. I could even say that everything else in AutoCAD is ancillary to these commands.
Don’t forget the command line
Back in the day, late last century when I started with AutoCAD (1986), it was a DOS based programme. The only way to input commands was with the command line.
In class I like to make everybody aware of the command line as many people ask, “why do we need to look at the command line, isn’t that for scripting?” The truth is the command line is not just for giving commands.

The command line is the way AutoCAD communicates with you the user. Let’s say we select the line command from the draw menu.

You will see that the command line is asking you a question about what you want to do with the line. It is asking you to specify a start point for the line. If you now left click, AutoCAD places a start point where you have clicked. It then asks the next question.

If you then click another point you will have a line. This may sound unnecessarily simple in an explanation, but we have a very important concept here to understand how AutoCAD communicates with you. If I were to press the enter key now, we would have a completed line.
The way we are communicating with AutoCAD is starting to set a few rules in place. We left clicked to start the line. We left clicked to select a second point to the line. You will notice that if we continued to left click we would create more lines. In the Image above when you are asked to specify next point you also have an option to Undo. Left clicking on this word or pressing the letter indicated in uppercase and blue, in this case U will execute that option. Pressing the enter key will finish the command. To simplify this communication, I will say when you left click you are giving AutoCAD a command and when you press enter you are saying I have finished the command. You may remember that the key we call Enter used to be called Return. We type or left click to communicate and when we are finished, we Return control to AutoCAD.
A tip I tend to advise when drafting, particularly for new users, is to move the command line up from the bottom of the workspace to the underside of the ribbon.

This way when you are left clicking on a draw or modify icon your line of sight on the interface has both the commands and the communication very close together. This is important in consolidating what you want and what AutoCAD is asking you. As monitor resolution gets better sometimes new users are not seeing what the command line is asking.
Drawing aids
AutoCAD of course is a very technical drafting application. Just left clicking in the model space is not accurate enough for any engineering precision. We have a host of very comprehensive drawing aids to help us with our draughting.
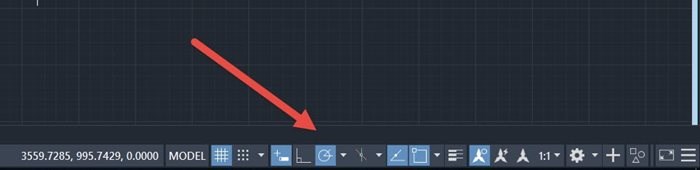
The drawing aids are shown at the bottom of the screen towards the right-hand side.
During my AutoCAD training class we look at many of the aids however I wanted to look at these generally in this article as sometimes people starting AutoCAD simply are not aware that draughting in AutoCAD does give you many tools and features to make mastering AutoCAD in a logical supportive process.
The tools are shown along the bottom right. This works as you are looking at the workspace and these tools are set just out of eye line. The blue indicates the tool or aid that is active, those in grey indicates the aid is available but not active in this workspace. Having these tools placed here and the function to make active or not is a great way to set up the aids for the present draughting session. To customise these available aids we look to the customisation icon at the far right.
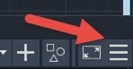 This will take us to the full list of drawing aids that are available. A tick mark to the left of each entry in the list indicates the drawing aid is available in the drawing aids bar in the workspace.
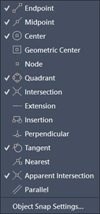
Each of the drawing aids on the panel has options to set for the draughting session. You can see this on the object snap drawing aid.
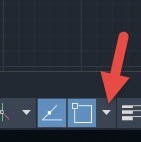
This then brings up a list of snap option. These are running snaps meaning that the set snap is active all the time.
To Summarise
 The very first process to understand is the fluidity of Draughting the geometry required. Practicing this area will reap many rewards as you personalise your style and workflow.
As I mentioned, the main tools in AutoCAD are the first two menus in the first tab on the first ribbon. Having a comfortable eye line in draughting is ninety percent of the journey to mastering AutoCAD. Top left are the comfortable decision tools. Glancing down to the bottom right for session changes make the whole draughting experience very fluid and through practice of the tools and aids your journey becomes very fast.
Take a look at our full range of AutoCAD training courses here.

Author
Geoff Alder
Geoff Alder has been training Autodesk applications for 25 years. He came into training from practical experience in the building industry. He has designed and carried out technical training all over the world.
Geoff is a particularly dedicated trainer on 3D applications and has won awards from Autodesk for training on 3ds max.


