The basic premise here is to keep at least two Revit project files; one for the site and one for the building. The main reason for keeping these separate is to accommodate any future repositioning of the building, but it also allows for the easy set-up of any additional Revit models required as the project progresses.
Preparing the Site File
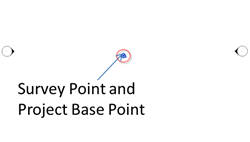
During my Revit courses I simply create a new project file from the standard Architectural template and name it to include the word “Site”, for obvious reasons. I use the Architectural template because it includes a “site” floorplan, showing the survey and project base points. Since this is to be my site file, I also set the default units to display in metres.
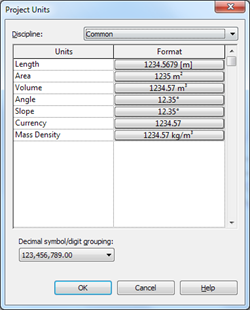
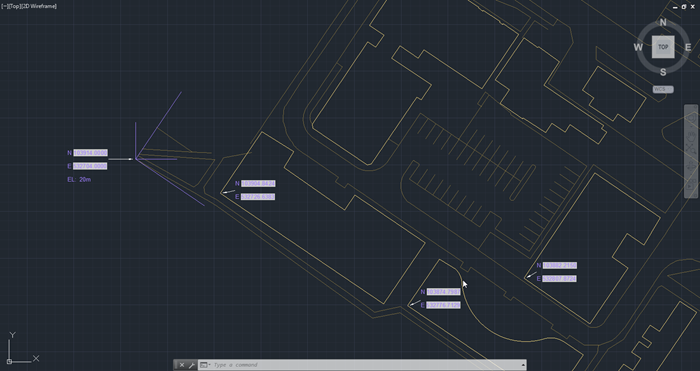
The units obviously aren’t very important, they just make reading the coordinates a little easier. The next step is to reference in the survey file; I use a very simple dwg example drawing during my Revit courses, oriented to its OS location. I also include a few tagged locations for confirmation, once the file is referenced into my Revit model.
There are a few things to note about the settings I use when creating the link:
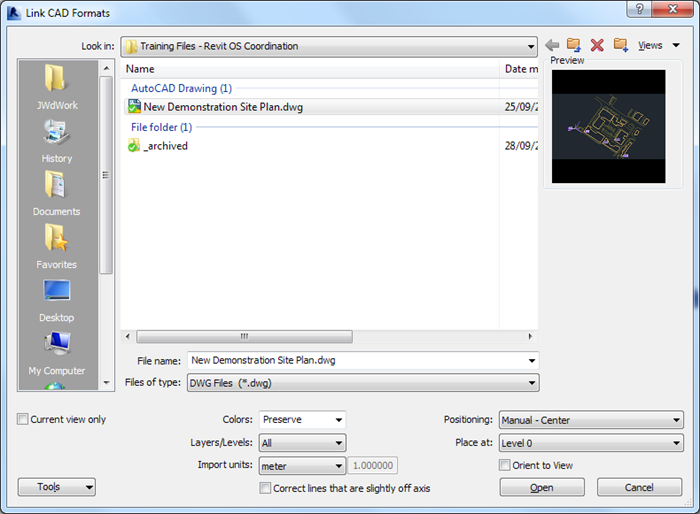
- Setting the import units to those used in the AutoCAD (survey) file ensures that the file is represented at the correct scale
- I set the positioning to use “Manual – Center”, since the file is going to be relocated to match Revit’s base point (both survey and project base points are currently coincident)
- Selecting “Current view only” is optional; removing this restriction will allow a toposurface to be created from any 3D contour lines available in the drawing
- “Layers/Levels” I leave set to “All”. The drawing has already been cleaned of any unwanted information prior to being referenced into Revit
- I always deselect the option “Correct lines that are slightly off axis”, since this can produce unwanted results during the referencing process
When quoting from the Revit 2019 help file:
Selected by default, this option automatically corrects lines that are slightly off-axis (less than 0.1 degree) and helps avoid problems with Revit elements generated from those lines. You may want to clear this option when importing/linking to site plans.
The drawing is then moved so that the agreed site base point is coincident with the Revit base points.
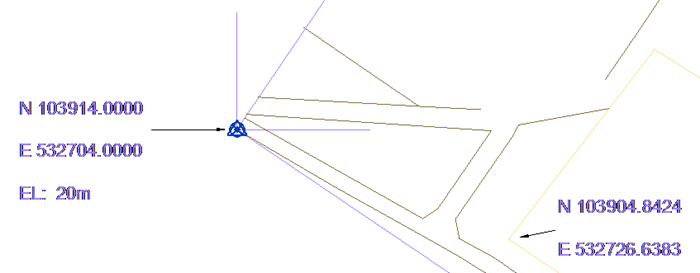
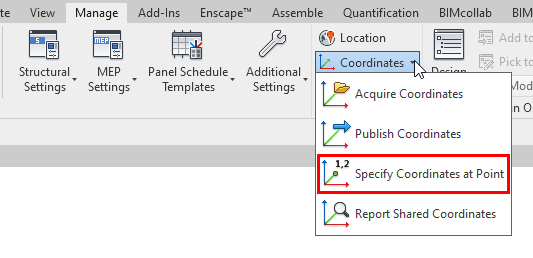
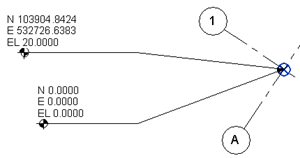
The OS location is now set, using “Coordinates – Specify Coordinates at Point”.
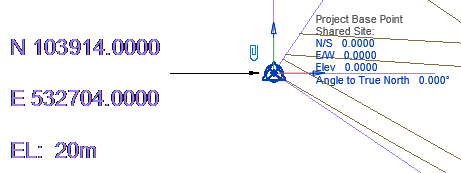
The Project Base Point is selected and is relocated to the new location:
The Site file can now be saved and closed.
Preparing the Building File
I start by creating a new Revit project file from the standard Architectural template. Using the “Site” floor plan view, I simply draw two model lines across the base points, to indicate these when this file is referenced into the Site file.
Now the relationship between this point and the building will be agreed, and stated, in the BIM Execution plan; it could be at specific grid intersection, or at a specified offset, but that is not the subject of this blog.

Creating the Shared Coordinates
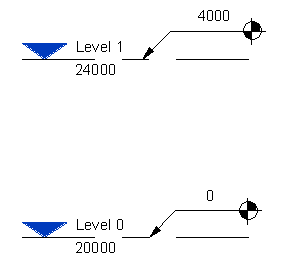
The Site file is reopened, and the Building file referenced in; I generally use either the “Manual – Base Point” or “Manual – Center” positioning option, since the building is going to be correctly located on the site. The elevation (Z offset) of the building can also be set at this point, by selecting it in one of the predefined elevation views and adjusting up or down. During my Revit training courses, I generally leave this (it will “inherit” the 20m elevation that was set at the beginning).
Once the building is correctly located on the site, we use “Coordinates – Publish Coordinates” to write this new location into the Revit Building file.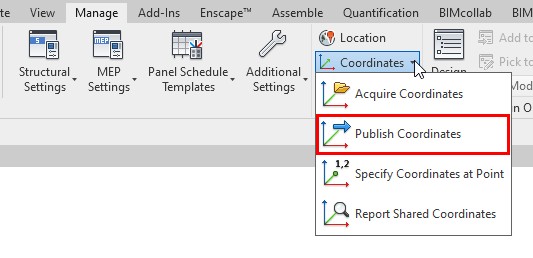
Confirming the Shared Coordinates
When the building file is reopened, views can be set to show either Project or True North orientation.
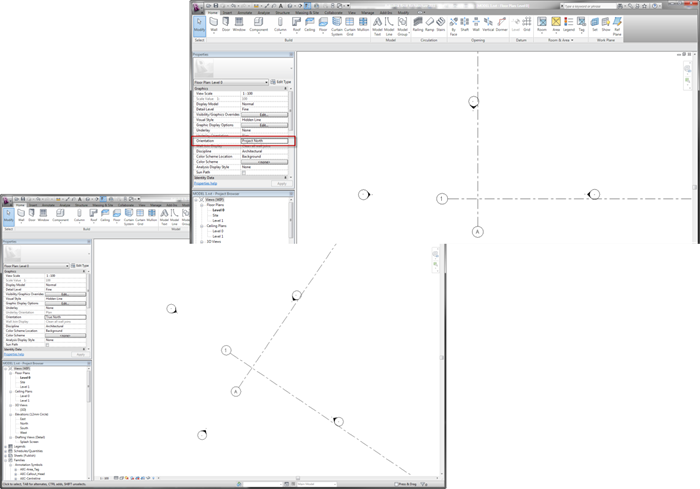
Coordinate values can now be reported in this file using either project or survey origins.
The Building file will now tolerate any number or relocations, by simply moving it from within the Site file. Revit will even prompt you that the file must be saved to write the changes back to the Building file.
Talk to us about your Revit challenges.
For a full list of Revit courses, click here.

Author
Johnathan Ward
From a background in both the construction and manufacturing industries, Johnathan has gained a detailed working knowledge of both the processes and workflow methodologies employed in achieving the optimum operational performance.


